在完成搭建环境的工作后,我们将得到一个目录包含如下文件:

开始编译
可以看到Release_to_customer.sh脚本执行时需要传递3个参数(-f、-p、-q、-o);
- -f 表示flash的类型,可选nand、nor;
- -p 表示芯片型号,可选ssd201、ssd202;
- -q 表示快速启动模式,可选fastboot或空;
- -o 表示选择相应的开发板配置,可选2DO6或2D07;
2D06:双网口配置;2D07:7寸开发板配置
while getopts "f:p:q:" opt; do
  case $opt in
    f)
      flashtype=$OPTARG
      ;;
    p)
      project=$OPTARG
      ;;
    q)
      fastboot=$OPTARG
      ;;
    o)
      project=$OPTARG
      ;;
    \?)
      echo "Invalid option: -$OPTARG" >&2
      ;;
  esac
done
这里以nand+ssd201为例,开始编译源码:
# ./Release_to_customer.sh -f nand -p ssd201 -o 2D06编译完成后,将在images目录下生成系统镜像,接着我们就可以通过第三章的操作将这些镜像烧录到芯片中。

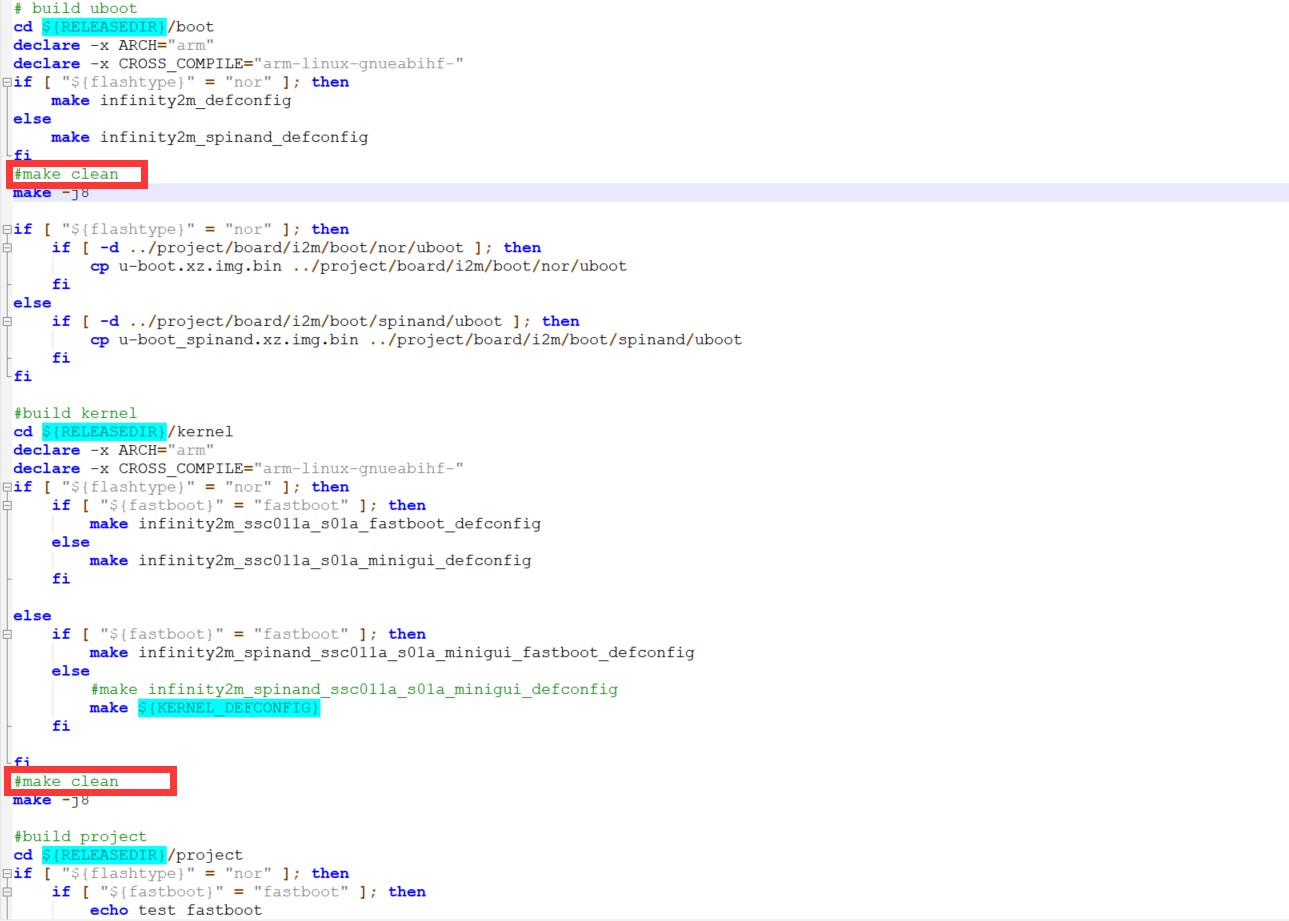
在编译过一次后,如果不换芯片型号,可以把Release_to_customer.sh中uboot和kernel的makeclean注释。

对kernel的配置后,通过Release_to_customer.sh脚本编译会覆盖修改kernel的内容,导致修改没生效,所以每次修改kernel后,需要拷贝其配置(kernel目录下):
cp .config ./arch/arm/configs/infinity2m_spinand_ssc011a_s01a_minigui_double_net_defconfig -f
编译 buildroot
Release_to_customer.sh没有包含buildroot的配置,因此buildroot需要单独配置。
# tar -jxvf buildroot-2020.05.tar.bz2 -C .
# cd buildroot-2020.05/
# ARCH=arm make menuconfig-
Target options->

-
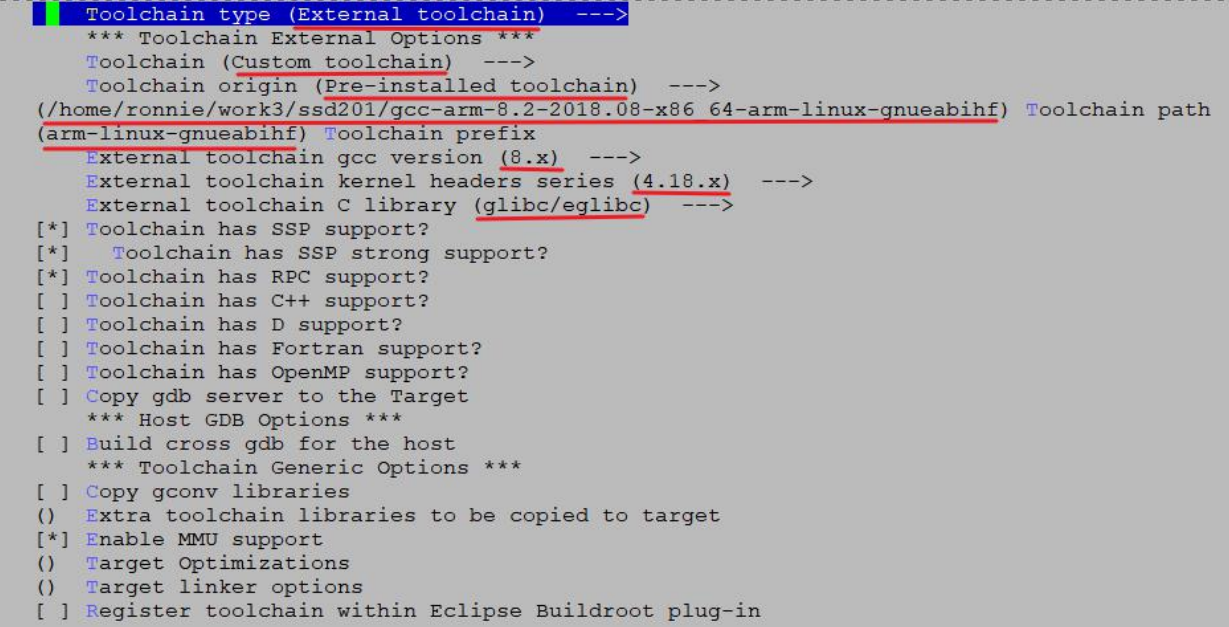
Toolchain–>

配置好后“save”保存,然后编译。
# make编译完成后,将在output/target/目录下生成我们需要的文件系统。
声明:本站所有文章,如无特殊说明或标注,均为本站原创发布。任何个人或组织,在未征得本站同意时,禁止复制、盗用、采集、发布本站内容到任何网站、书籍等各类媒体平台。如若本站内容侵犯了原著者的合法权益,可联系我们进行处理。


